

Naan Greek Pizza

Naan Greek Pizza

Tender chicken, juicy tomatoes, creamy feta, and distinctive tzatziki sauce and Kalamata olives come together to make the most perfect and Amazing Naan Greek Pizza! The naan bread is so soft and delicious. Layering all of these ingredients makes for a simple dinner but one that tastes gourmet!
Prep Time10 minutes
Cook Time12 minutes
Total Time22 minutes
Course: Appetizer, Main Course
Cuisine: Greek
Servings: 2
Author: Steve Pohlman

Ingredients

  • 1-2 thin cut Chicken Breasts seasoned with Greek seasonings
  • 1/4 cup Kalamata Olives rough chop
  • 1/2 cup Spinach Leaves rough chop
  • 1/2 cup Feta
  • 1/2 cup Cherry Tomatoes rough chop
  • 1/4 Cup Tzatziki

Instructions

  • Preheat the oven to 400 F.
  • Heat a skillet on medium heat with 1 TBS of olive oil. Place your chicken breasts on the skillet and season up-facing chicken with 1TBS of greek seasoning.
  • After 4 minutes of cooking, flip the chicken and repeat with the seasoning. Cook until internal temperature of chicken is 165F. Remove from heat , cut into bite-sized pieces and set aside.
  • With your naan bread on a flat surface, spread 2-3 TBS of Tzatiki on the top. Next, place about 1/2 Cup of diced chicken on top.
  • Follow with 1/2 Cup diced spinach leave, 1/4th cup Kalamata olives and 1/2 cup of cherry tomatoes, cut in half length-wise.
  • Top with 3/4 Cup of feta.
  • Bake for 10-12 minutes.
  • Remove from oven and enjoy!

Notes

  • -The recipe above is for use on ONE Naan flatbread. If using two, just double the ingredients.
  • -All measurements for pizza toppings are based on a ratio we prefer. Leave off ingredients you don’t like and add more of anything you love! This is definitely customizable!
Thin and Crispy Chocolate Chip Cookies

Thin and Crispy Chocolate Chip Cookies

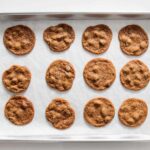
Thin and crispy chocolate chip cookies are the Pringles of dessert, so rich and crunchy and light that it's hard to stop eating them.
Prep Time15 minutes
Cook Time20 minutes
Cooling1 hour 30 minutes
Total Time2 hours 5 minutes
Course: cookies
Cuisine: American
Servings: 56 cookies

Equipment

  • 1 1-tablespoon cookie scoop

Ingredients

  • 8 ounces low protein all-purpose flour such as Gold Medal blue label or Whole Foods 365 blue label (about 1 3/4 cups, spooned; 225 g)
  • 8 ounces light brown sugar not dark brown (about 1 cup, firmly packed; 225 g)
  • 3 1/2 ounces raw cane sugar not white (about 1/2 cup; 100 g)
  • 2 teaspoons 8 g Diamond Crystal kosher salt; for table salt, use about half as much by volume or the same weight
  • 1 1/2 teaspoons 8 g baking soda
  • 8 ounces cold unsalted butter, cut into 1-inch chunks (about 16 tablespoons; 225 g)
  • 8 ounces assorted chocolate chips preferably no darker than 70%, see note (about 1 1/3 cups; 225 g)
  • 1 large egg straight from the fridge, well beaten (1 3/4 ounces; 50 g)
  • 1/2 ounce vanilla extract about 1 tablespoon; 15 g

Instructions

  • Adjust oven rack to middle position and preheat oven to 350°F (175°C). In the bowl of a food processor, combine flour, light brown sugar, raw cane sugar, salt, and baking soda. Process until well-combined; add cold butter and pulse to form a dry and powdery mix; comparable results cannot be produced by hand or with a stand mixer. Add chocolate chips and pulse once or twice to combine. This mixture can be refrigerated up to one week in an airtight container or used immediately in the next step.
  • Transfer the cookie “mix” to a large bowl; add egg and vanilla, stir well; the mixture will seem alarmingly crumbly and dry at this stage. Once the wet ingredients have been absorbed, knead mixture by hand until it comes together like classic dough.
  • Divide into about 56 portions with a 1-tablespoon scoop. If you like, these can be transferred to a zipper-lock bag and refrigerated for up to 1 week or frozen for up to 3 months; soften to about 68°F (20°C) before baking.
  • Arrange portions on a parchment-lined half-sheet pan (do not use a silicone mat), leaving about 2 or 3 inches between cookies to account for spread. Bake until thin and golden brown, with an even color from edge to center, about 16 minutes. Cool cookies directly on the baking sheet until room temperature. Transfer to an airtight container and continue cooling an hour more; the cookies will not be fully crisped until then. At cool room temperature, the cookies will keep at least 6 weeks in an airtight container.

Maple Glazed Salmon

Maple Glazed Salmon

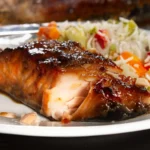
This maple glazed salmon recipe is so simple to make and it's perfect for one of those busy nights when you don't have a lot of time to get dinner on the table. Deliciously sweet maple syrup combines wonderfully with fresh garlic, ground ginger, and a touch of soy sauce as a marinade for the salmon. This is a healthy recipe that's low in fat and high in protein!
Prep Time10 minutes
Cook Time15 minutes
marinade30 minutes
Total Time55 minutes
Course: Main Course
Cuisine: American
Keyword: Salmon
Servings: 4
Author: Steve Pohlman

Ingredients

  • 1 lb. salmon fillet
  • 1/4 cup Maple syrup
  • 2 tbsp. soy sauce
  • 2 cloves garlic finely minced
  • Pinch of ground ginger – or more to taste
  • Pinch of pepper

Instructions

  • Place the salmon in a glass baking dish and sprinkle with garlic, ginger and pepper.
  • Combine the soy sauce and in maple syrup in a small measuring cup and pour over the salmon.
  • Allow the salmon to marinate in the dish with the maple syrup and spices for about 30 minutes. Flip your salmon over half way through marinating so the skin side is up and pink part is immersed in the sauce – this will help spread the flavours through the whole piece. I allow mine to marinate in the dish on the counter while I prep anything else I’m going to be serving with the salmon. You can also marinate this over night if you like.
  • Before cooking your salmon, flip it back over so the pink side is facing up. Spoon some of the sauce over top. Set your oven to broil and cook the salmon for about 15 to 20 minutes. While the salmon is cooking, be sure to check on it a few times and spoon some of the maple syrup mixture from the bottom of the dish over top of the salmon.
  • The top of the salmon should become golden and the texture should be flaky when done.
  • Split the salmon into about four pieces and serve with rice and veggies. Don’t forget to spoon some of that delicious sauce from the bottom of the pan onto the tops of your salmon.

Notes

  • If you marinate the salmon in the fridge, please make sure that you take it out ahead of time and allow it to reach room temperature before cooking. This is very important since cooking the salmon while it's ice cold or chilled will result in uneven cooking.
  • If you're cooking a bigger piece of salmon, you can double or triple the marinade recipe. Follow the same instructions as above but you may need to increase the cook time.

Classic Apple Crisp Recipe

Classic Apple Crisp Recipe

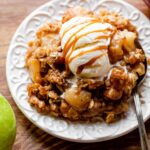
This classic apple crisp combines warm gooey cinnamon apples with a buttery brown sugar oat topping.
Prep Time15 minutes
Cook Time45 minutes
1 hour
Course: Dessert
Cuisine: American
Keyword: apples
Servings: 10
Author: Steve Pohlman

Ingredients

Filling

  • 8 medium peeled apples cut into 1-inch chunks that are 1/4 – 1/2 inch thick (about 10 cups, or 1200g, chunks)
  • 1/2 cup 100g packed light or dark brown sugar
  • 1/4 cup 31g all-purpose flour (spooned & leveled)
  • 1 teaspoon pure vanilla extract
  • 1 teaspoon ground cinnamon
  • 1/2 teaspoon ground nutmeg
  • 1/4 teaspoon salt

Topping

  • 3/4 cup 94g all-purpose flour (spooned & leveled)
  • 3/4 cup 150g packed light or dark brown sugar
  • 1 teaspoon ground cinnamon
  • 1/2 cup 8 Tbsp; 113g unsalted butter, cold and cubed
  • 1 cup 85g old-fashioned whole rolled oats
  • optional: salted caramel and vanilla ice cream for serving

Instructions

  • Preheat oven to 350°F (177°C). Lightly grease a 9×13-inch baking pan. Any 3.5-4-quart baking dish works.
  • Mix all of the filling ingredients together in a large bowl, then spread into the baking pan.
  • Make the topping: Whisk the flour, brown sugar, and cinnamon together in a medium bowl. Cut in the butter using a pastry cutter or fork until the mixture becomes super crumbly. Stir in the oats. Sprinkle over filling.
  • Bake for 45 minutes or until the topping is golden brown and the fruit juices are bubbling around the edges. Remove from the oven, place on a wire rack, and allow to cool for at least 5 minutes before serving. Serve warm, room temperature, or cold; plain or with salted caramel and/or vanilla ice cream.
  • Cover leftovers and store in the refrigerator for up to 5 days.

Raspberry Muffins with Streusel Topping

Raspberry Muffins with Streusel Topping

Amazingly easy Raspberry Muffins with a sweet streusel topping just like you'll find in a professional bakery!
Prep Time30 minutes
Cook Time23 minutes
Total Time53 minutes
Course: Breakfast, Brunch
Cuisine: American
Keyword: Muffin, Raspberry
Servings: 12
Author: Steve Pohlman

Ingredients

For the muffins:

  • 2 ¼ cups all-purpose flour 298g
  • ½ teaspoon salt
  • 2 ½ teaspoons baking powder
  • ¼ teaspoon baking soda
  • ¾ cup granulated sugar 170g
  • 2 large eggs room temperature
  • ¼ cup whole milk 2oz
  • 1 cup sour cream 8oz or full fat yogurt
  • 8 tablespoons unsalted butter melted and cooled slightly 113g
  • 2 teaspoons vanilla extract
  • 2 cups frozen raspberries 8oz

For the streusel topping:

  • ¾ cups all-purpose flour 100g
  • ¼ cup brown sugar packed 56g
  • ¼ cup granulated sugar 55g
  • pinch of salt
  • 4 tablespoons unsalted butter melted 56g

Instructions

To prepare the muffins:

  • Preheat oven to 400°F. Lightly grease 12 muffin cups or cupcake liners with vegetable cooking spray. Be sure to coat the top edge of each muffin cup so the muffins won’t stick. Set aside.
  • Reserve 1 tablespoon of flour. In a large mixing bowl whisk together the remaining flour, salt, baking powder, baking soda and ¾ cup granulated sugar. Make a well in the center.
  • In a small mixing bowl whisk the eggs until slightly pale. Add the milk, sour cream, melted butter and vanilla and whisk again. Pour the sour cream mixture into the flour. Fold together with a spatula until the dry ingredients are just moistened. Don’t over-mix.
  • Toss the reserved flour with the raspberries until coated. Gently fold the raspberries into the batter just until combined.
  • Using a large ice cream scoop, portion out a heaping mound of batter and drop into the muffin tin well leaving the batter rounded on top. Repeat with the remaining batter filling all 12 muffins wells. Set the unbaked muffins aside for 15 minutes while preparing the streusel topping.

Prepare the streusel topping:

  • Combine the flour, sugars and salt in a bowl. Drizzle with melted butter and toss with a fork until evenly moistened and the mixture forms large chunks with some pea – sized pieces.
  • Divide the streusel in mounds on top of the muffins. Try to keep the bulk of the streusel in the center of the muffin as much as possible.
  • Bake at 400°F for 20 to 23 minutes or until just set and a toothpick inserted in the center comes out with no wet batter. Cool the muffins in the pan on a rack for 5 minutes. Transfer the muffins to a wire rack to cool. Serve slightly warm or room temperature.

Recipe Notes

  • Store muffins in an airtight container at room temperature for up to 3 days.
  • Muffins can be frozen for up to 3 months. Thaw overnight in the refrigerator.

Portuguese Custard Tarts with Puff Pastry

Portuguese Custard Tarts with Puff Pastry

Portuguese custard tarts with puff pastry or “pasteis de nata” are a specialty pastry all over the beautiful country of Portugal.  With a cinnamon and citrus flavored custard nestled in a flaky puff pastry crust they are highly addictive.
Prep Time20 minutes
Cook Time20 minutes
Total Time40 minutes
Course: Dessert
Cuisine: Portuguese
Keyword: Custard
Servings: 12
Author: Steve Pohlman

Ingredients

Pastry

  • 14 ounce / 1 ounce /400g ready rolled store bought

Syrup

  • ¾ 150g white granulated sugar
  • cup 75 ml water

Milk and Flour mixture

  • 1 cup 250ml whole / full fat milk (divided in half)
  • 3 ¾ Tablespoon 30g plain or all-purpose flour
  • 1 stick cinnamon
  • 1 Peel only of one medium size lemon

Egg yolks

  • 4 large egg yolks only

Instructions

The Pastry

  • Lightly flour a work surface and cut puff pastry into roughly 12 equal rounds using a 3 ½ inch (roughly 8 ½ to 9 cm) cookie cutter.
  • Use cooking spray or melted butter to lightly grease 12 egg tart molds OR a 12-cup regular muffin pan.
  • Press each piece of puff pastry down and up onto the sides of the muffin holes until evenly distributed.
  • Place the molds or muffin pan with the pastry in the refrigerator while you prepare the syrup and custard. See note 3

Make The syrup

  • Add water and sugar to a small pot and place on the stove. Turn the heat up to medium and stir for about 1 minute to dissolve the sugar.
  • When you see tiny bubbles appear on the surface of the pot, set a timer to 3 minutes.
  • During these 3 minutes, leave the syrup to boil WITHOUT stirring.
  • Turn the stove off, take the pot off the stove and set aside while you prepare the custard. The syrup will continue to thicken as it cools. This is normal and will be at the perfect consistency when it is time to mix into the custard.

Make the milk and flour mixture

  • Pour half of the measured milk into the bowl with the flour. Whisk until smooth and the flour dissolved.
  • Pour the remaining milk into a medium sized pot and add in the cinnamon stick, lemon peel.
  • Place the pot on to the stove and heat for 1 minute on a medium setting.
  • Leave the pot on the heat and slowly pour in the the dissolved flour mixture while whisking continuously.
  • Within approximately 1 minute you will notice the mixture thickening. As soon as it starts to thicken, turn off the stove or gas and take the pot off the heat.
  • Pour the syrup into the thickened milk mixture and whisk for about 1 minute, until smooth.

The egg yolks

  • Pour about a tablespoon of the combined milk/syrup mixture into the bowl with the egg yolks. Whisk for 10 seconds until combined.
  • This is referred to as tempering the eggs. It’s when a little of the hot liquid is added to the eggs. This brings the eggs to approximately the same temperature of the hot mixture. The tempered eggs are now stable enough to be added to the rest of the hot mixture without the risk of it curdling or scrambling.
  • Pour the tempered egg yolks into the pot with the milk/syrup mixture. Do not place the pot back on to the stove or heat
  • Whisk for 1 minute to form a smooth custard. Don’t worry if the custard doesn’t look very thick now. This is normal and will thicken and set once it has baked.

Strain the custard

  • Place a sieve or strainer over a measuring jug or bowl. Pour the custard through the sieve.
  • This is so that you are left with a smooth custard as it passes through the sieve. Any bits of flour that might not have dissolved will be caught in the strainer.
  • Discard the cinnamon stick, lemon peel and any bits of flour caught in the strainer.

Assemble and bake

  • Pre heat the oven to a very hot 470°F (240°C) 220° (fan).
  • Get the cold molds or muffin tin lined with the puff pastry out of the refrigerator.
  • Fill the puff pastry cases just under ¾ full. The custard will not spill over the cases as it bakes. It will thicken and puff up while baking, then deflate and shrink back down as it cools.
  • Immediately after filling, place the filled pastry cases into the very hot preheated oven.
  • Bake for between 18 to 25 minutes until the shells are golden brown and crisp. See note 4
  • The custards will be set, and the tops scorched with spots. See note 5
  • Remove from the oven and leave to cool in the pan on a wire rack for 5 minutes. Then, remove the tarts from the pan or molds and transfer to a wire rack.
  • Sprinkle with cinnamon if you prefer. Serve warm.

Storage

  • At room temperature: 1 to 2 days in an airtight container
  • In the refrigerator: Up to 5 days in an airtight container.
  • In the freezer: The texture of the baked custard tarts degrades rapidly the longer they are left in the freezer. I would advise only storing them frozen for up to a month.
  • Beyond this point, they’ll become grainy and the custard sometimes splits. As always, make sure you take time to label your frozen tarts so you know when to consume them by.

How to reheat

  • Portuguese custard tarts can be eaten cold. If you prefer it warmed, this can be done in the microwave for a few seconds or reheated in the oven:
  • To reheat and crisp up your Portuguese egg tart from the refrigerator simply preheat your oven to 350°F (175°C) and bake for 6-8 minutes. If reheating from frozen, then bake for 13-15 minutes.

Recipe Notes

  • Traditional recipes are made using homemade puff pastry. This recipe is adopted for the pre made puff pastry. If using store bought frozen puff pastry, try to get the best quality pastry and allow it to thaw out, but still be cold before cutting into rounds. DO NOT use short crust pastry. Puff pastry is recommended which produces a flaky baked crust
  • It's important that the puff pastry dough be cold in the molds or muffin tin before filling with the warm custard. Refrigerating keeps the butter in the pastry firm and cold. When it's time to fill, the warm custard will not soak into it. This will prevent a soggy crust. You want a flaky crust, not soggy. The filled pastry must then be placed in the preheated oven right after you pour the custard, because if you wait and let them sit, the custard will seep into the shells and the bottoms may get soggy.
  • Don't be alarmed if you see the custard puff up while baking. This is normal, they will puff up then deflate and shrink back down as it cools.

Cajun Firesticks with Fire & Ice Dipping Sauce

Cajun Firesticks With Fire & Ice Dipping Sauce

These Firecracker Chicken Skewers are the perfect mix of heat and flavor, making them an appetizer favorite!
Prep Time15 minutes
Cook Time10 minutes
Marinade Time2 hours
Total Time2 hours 25 minutes
Course: Appetizer
Cuisine: Cajun
Keyword: Chicken
Servings: 12
Author: Jeri Brooke

Ingredients

Chicken

  • 4 skinless, boneless chicken breasts
  • 2 tablespoons Cajun Spice
  • 1 tablespoon fresh lime juice
  • 1 tablespoon olive oil

FIRE AND ICE DIPPING SAUCE (makes 1 cup)

This sauce also makes an excellent marinade for chicken or lamb

  • 1/2 cup plain yogurt
  • 1 tablespoon brown sugar
  • 2 scallions coarsely chopped
  • 1 tablespoon fresh lime juice
  • 2 jalapeno peppers seeded & chopped
  • 3/4 cup loosely packed cilantro leaves
  • 1/4 cup loosely packed fresh mint leaves or 1 teaspoon dried
  • Salt and freshly ground white pepper

Instructions

Chicken preparation

  • Rinse chicken with cold water and pat dry. Slice each breast in half lengthwise and then crosswise in quarters to make a total of 8 pieces per breast half.
  • In a medium bowl, combine chicken pieces with Cajun Spice Blend, lime juice, and olive oil. Toss to coat well. Cover and marinate 1 to 2 hours at room temperature, or up to 24 hours refrigerated. Soak 16 bamboo skewers in water at least 30 minutes to prevent burning.
  • Prepare a hot fire. Thread 2 pieces of chicken onto each skewer and place on an oiled grill set 4 to 6 inches from coals. Grill, turning occasionally, until chicken is white throughout but still moist, about 8 to 10 minutes. Serve with Fire and Ice Dipping Sauce.

Fire & Ice Dipping SAuce

  • Combine all ingredients in a food processor or blender. Puree until smooth.
  • Season with salt and white pepper. Cover and refrigerate until serving time.

Perfect Peach Crisp

Perfect Peach Crisp

This buttery peach crisp combines sweet and juicy peaches with brown sugar cinnamon oat streusel. Toasty pecans add a little crunch while vanilla ice cream adds a lovely contrast to the warm peach filling.
Prep Time15 minutes
Cook Time45 minutes
Total Time1 hour
Course: Dessert
Cuisine: American
Keyword: Peach
Servings: 8
Author: Steve Pohlman

Ingredients

Filling

  • 5 cups around 750–800g sliced peaches (peeled or unpeeled)
  • 1/4 cup 31g all-purpose flour (spooned & leveled)
  • 1/2 cup 100g granulated sugar
  • 1/8 teaspoon salt
  • 1 Tablespoon 15ml lemon juice
  • 1/2 teaspoon pure vanilla extract

Topping

  • 1/2 cup 100g packed light or dark brown sugar
  • 2/3 cup 84g all-purpose flour
  • 1 teaspoon ground cinnamon
  • 1/4 teaspoon salt
  • 1/2 cup 113g unsalted butter, very cold and cubed
  • 2/3 cup 57g old-fashioned whole rolled oats (or quick oats)
  • optional: 2/3 cup 95g chopped or halved unsalted pecans

Instructions

  • Preheat the oven to 350°F (177°C). Lightly grease a deep-dish 9-inch pie dish, 9-inch square pan, 10-inch cast iron skillet, or any 2–2.5-quart baking dish. Set aside.
  • Gently mix all of the filling ingredients together in a large bowl, then spread into the baking dish.
  • Make the topping: Whisk the brown sugar, flour, cinnamon, and salt together in a medium bowl. Cut in the butter using a pastry cutter or forks until the mixture is crumbly. Fold in the oats and pecans. Sprinkle evenly over filling.
  • Bake for 45–50 minutes until the topping is golden brown and the fruit juices are bubbling around the edges. Remove from the oven, place on a wire rack, and allow to cool for a few minutes before serving warm. You can also serve room temperature or cold.
  • Cover leftovers and store in the refrigerator for up to 5 days.

Notes

  • Make Ahead & Freezing Instructions: I do not recommend preparing and refrigerating the crisp, unbaked, because the filling will become extra juicy the longer it sits. You can, however, prepare the topping up to 2 days in advance and cover and refrigerate it until needed. Baked crisp freezes well for up to 3 months. Thaw overnight in the refrigerator, then warm in a 350°F (177°C) oven for 20 minutes or until heated through.
  • Special Tools (affiliate links): Vegetable/Fruit Peeler | 9-inch Square Baking Dish, 10-inch Cast Iron Skillet (or similar size) | Glass Mixing Bowl | Pastry Cutter | Cooling Rack
  • Update in 2023: After making this peach crisp so often, I made a few slight tweaks to the original 2015 recipe. I reduced the sugar in the filling from 2/3 cup to 1/2 cup because it was a little too sweet. I also added some lemon juice to brighten up the flavor.
  • Baking Pan: Any baking pan that holds about 2–2.5 quarts is best. You could also divide the filling and oat topping up into individual oven-safe ramekins. Bake them on a baking sheet. The bake time and yield depends on their size, but bake until the topping is lightly browned and peach filling bubbles up around the sides.
  • Gluten Free: For a gluten-free crisp, use my recipe for gluten-free apple crisp and replace sliced apples with sliced peaches.
  • Can I Use Frozen or Canned Peaches? Fresh peaches are best for peach crisp, but you can get away with unsweetened frozen peaches. If using frozen peaches, thaw, chop, and blot them dry before using. Canned peaches are not ideal because they’re already too soft and mushy.

BANG BANG SHRIMP TACOS

BANG BANG SHRIMP TACOS

Course: Main Course
Cuisine: Mexican
Servings: 8
Author: Steve Pohlman

Ingredients

  • 8 corn or flour tortillas

For the Shrimp

  • 1 lbs shrimp
  • 1/2 cup buttermilk
  • 1/4 Tsp garlic powder
  • 1/4 Tsp sea salt
  • 1/4 Tsp black pepper
  • 1/4 Tsp onion powder
  • 1/4 Tsp cayenne pepper
  • 1 Tbsp olive oil

FOR THE SAUCE

  • 1/2 cup mayonnaise
  • 3 Tbl sweet chili sauce
  • 5 Tsp sriracha sauce

FOR THE SLAW

  • 3/4 cup shredded purple cabbage
  • 1/2 cup shredded carrots
  • 2 spring onions chopped
  • 1 tsp sugar
  • Salt to taste
  • 1/4 Tsp black pepper
  • 1 Tsp lime juice
  • 4 sprigs cilantro chopped
  • 4 Tbs mayonnaise
  • 3 Tbs cream
  • 2 Tbs cherry mustard honey mustard

Instructions

  • Pat shrimp dry with paper towel
  • In bowl, add all shrimp ingredients except shrimp
  • Mix well dry
  • Toss with shrimp
  • Heat oil in large pan.
  • Fry shrimp quickly on both sides in 2-3 batches
  • Remove to paper towel
  • Mix sauce
  • Briefly fry tortillas and stack on plate
  • Place tortilla on board, add slaw, shrimp, chopped cilantro and squeeze of lime.

Chocolate Tart W/Chocolate Shortbread Crust

Chocolate Tart W/Chocolate Shortbread Crust

Prep Time15 minutes
Cook Time36 minutes
Total Time47 minutes
Course: Dessert
Cuisine: American
Keyword: chocolate
Servings: 8
Author: Steve Pohlman

Equipment

  • 8 4” tart pans

Ingredients

Crust Ingredients

  • 1 3/4 cups flour
  • 10 Tbs butter
  • 1/2 cup confectioners sugar
  • 1/3 cup Dutch Process cocoa powder
  • 1/4 Tsp salt
  • 1/2 Tsp vanilla extract

Filling Ingredients

  • 1 cup heavy cream
  • 1 1/3 cups semisweet chocolate chopped in small blender
  • 1 large egg
  • 1/4 cup whole milk
  • 1 Tbsp unsalted butter

Instructions

Crust

  • Preheat oven to 325.
  • Stir and whisk flour, confectioners sugar, cocoa powder and salt in small bowl
  • Melt butter in microwave then pour into dry ingredients. Mix thoroughly.
  • Press dough evenly with fingers into 4” tart pans …. First around outside then bottom.
  • Trim off overhang at top. Reuse trim pieces.
  • Pierce bottom with fork several places.
  • Place pans on baking sheet and set timer for 18 minutes.
  • Check at 16 minutes. Probably needs a few more minutes. Check every minute. Best to underbake as it goes back in oven to bake filling.
  • Let cool before filling.

Filling

  • Reduce oven temperature to 300
  • Heat cream in saucepan until just bubbling around outside
  • Pour over chocolate in medium bowl
  • DO NOT STIR. LET SIT FOR 2 MINUTES THEN STIR
  • Whisk in butter first. Then egg then milk. Stir until fully combined.
  • Pour into cooled crust.
  • Place on cookie sheet and back in oven.
  • Bake for 16 minutes and check. Want edges set and center to jiggle.
  • Remove to wire rack.
  • Top with stabilized whipped cream.